

Table of contents
Atlassian Setup
WorkSights connects to Jira through Atlassian's OAuth framework. Once connected, Jira delivers issue activity to WorkSights via webhooks for all mapped users. Setup takes a few minutes and requires Jira administrator privileges.
WorkSights supports Jira Cloud. Confluence is not supported as it has no REST webhook API.
For an overview of how Jira activity appears in WorkSights, see Atlassian Integration Overview.
Connecting Atlassian
Step 1: Start the Connection
- Go to Services in the top navigation
- Find Atlassian in the list
- Click Connect Atlassian
Only Admins, Executives, and Owners in WorkSights can initiate this connection. The Jira account used to authorize the connection must have Jira administrator permissions.
Step 2: Authorize WorkSights in Jira
You will be redirected to Jira's OAuth authorization flow. Approve the requested permissions to allow WorkSights to read issue and user data and manage webhooks. Once approved, WorkSights registers the webhook automatically and you return to the integration page.
If your Atlassian account has access to multiple sites, you will select which site to connect. Each site connects separately. Repeat the process to connect additional sites.
Step 3: User Mapping
WorkSights imports Jira users and attempts to match them to WorkSights profiles by email. Open the Users tab to review mappings. For any user that did not map automatically, select the correct WorkSights user from the dropdown.
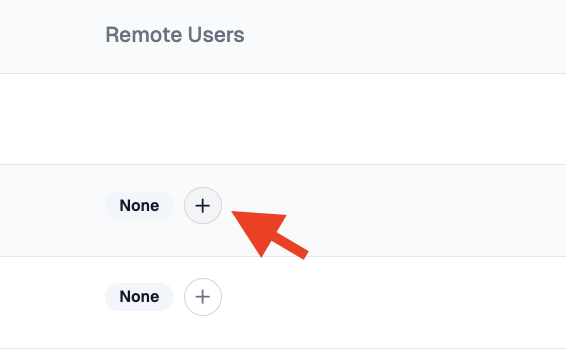
Atlassian hides user email addresses by default. When a webhook does not include an email, WorkSights cannot auto-create the mapping and that user's events will be skipped until they are mapped manually or email visibility is enabled in Atlassian workspace settings.
What Happens Next
Once connected and users are mapped, WorkSights begins receiving Jira activity for issue creation, updates, and comments. Activity appears on the timeline from this point forward. No historical data is imported.
Atlassian dynamic webhooks expire after approximately 30 days. WorkSights does not auto-renew them. When a webhook expires, Jira activity will stop appearing until you reconnect the integration. Reconnecting re-registers the webhook immediately.
User mappings and connection settings can be reviewed and updated at any time from the integration page.