

Table of contents
Account Details
Account Details is the full configuration view for your WorkSights account. It is where you manage your organisation's identity, users, reporting structure, connected services, holiday settings, and role categories all in one place.
You can reach it from Settings in the top navigation, then select Account and click your account name in the list.
Overview Tab
The Overview tab shows the core configuration of your account and is where you make account-level changes that affect how WorkSights operates for your whole organisation.
- Domain - the primary email domain associated with this account.
- Owner - the current account owner. Use the search icon to reassign if you have permission.
- Default Region - applied automatically when new users are created through connected services.
- Default Timezone - applied during automatic user creation via integrations.
- Score Visibility - controls whether the activity estimate feature is active and which user roles can access it. Options include Everyone, Executives and Managers only, and Disabled. See the Activity Scores guide for context on how this setting affects what your team sees.

Renaming an Account
By default WorkSights names the account based on the domain of the first connected service. To rename it, click the account name at the top of the page to enter edit mode, type the new name, and save.

AI Context
The AI Context field is where you describe your business to WorkSights AI: your priorities, operating model, and anything that helps the system interpret activity in the right light. This context is injected into every Observer analysis, daily report, and chat response for your account. The field shows who last updated it and when.
See the AI Context guide for detail on what to write and how it shapes your Insights.
Roles
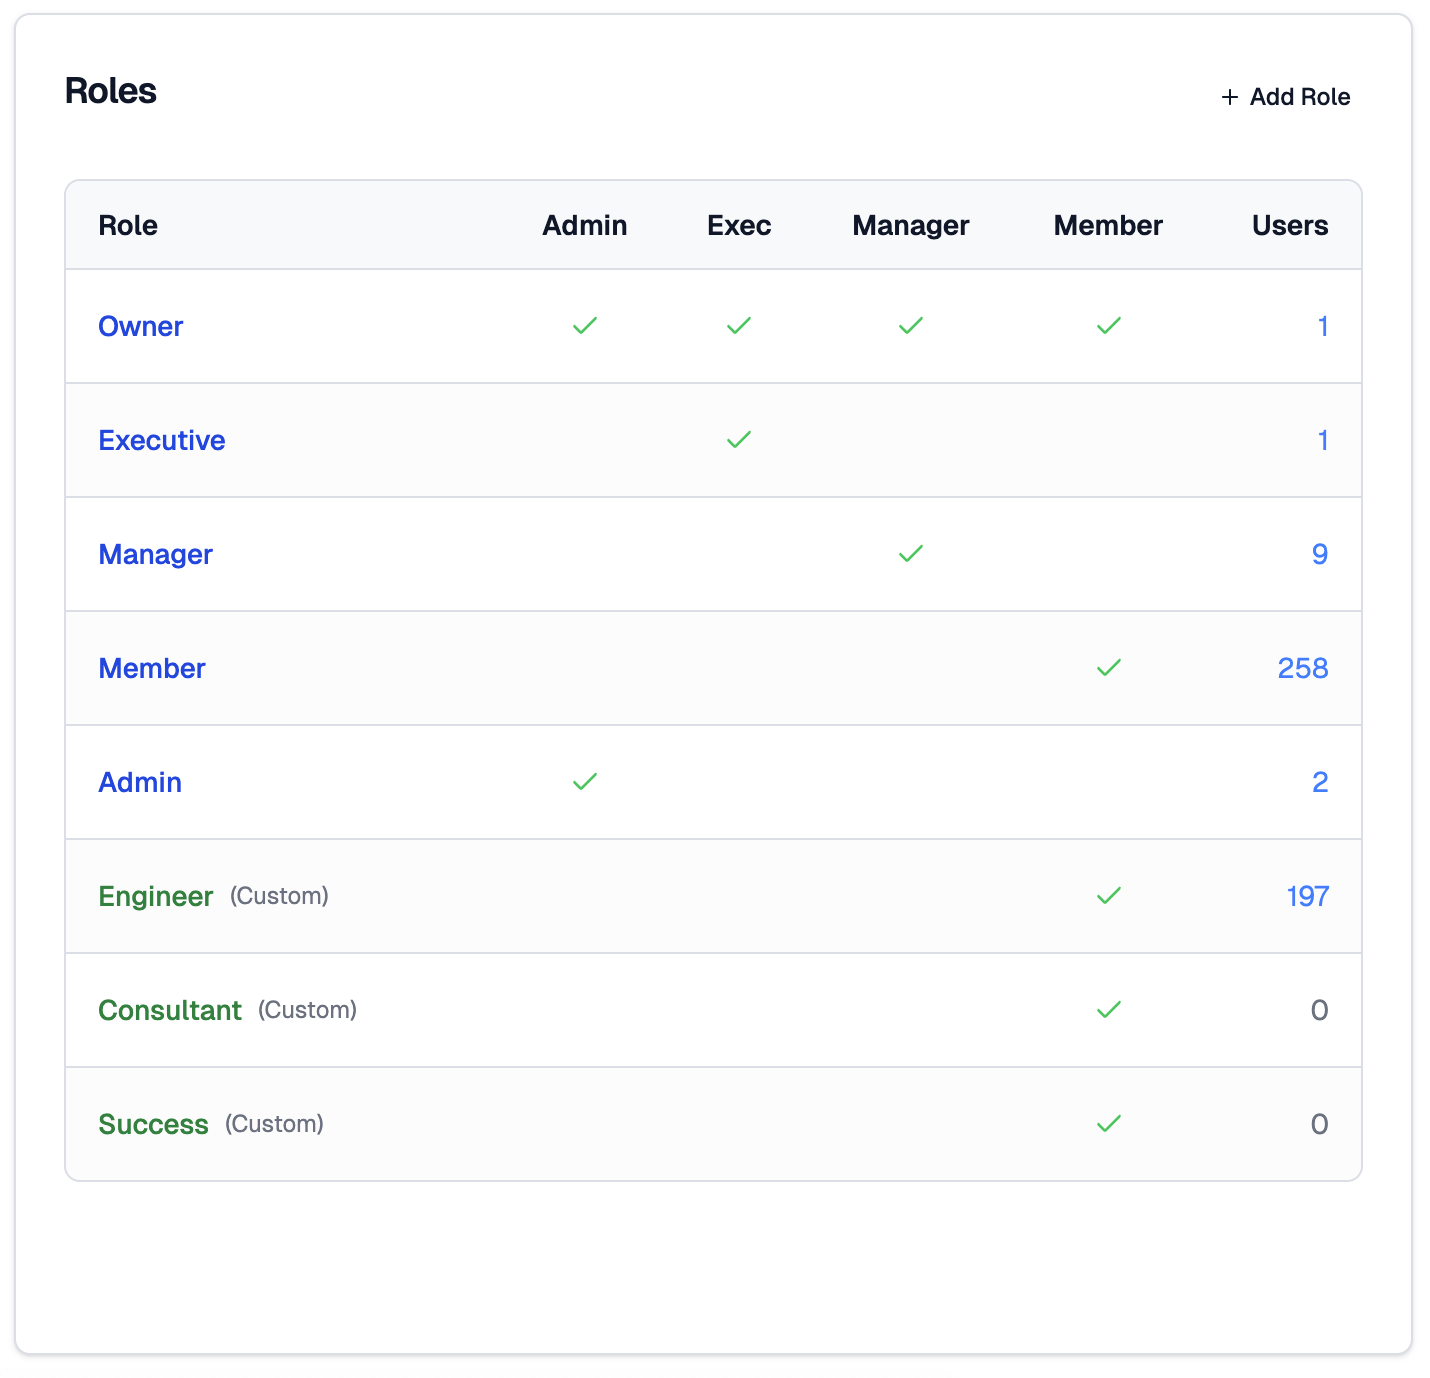
The Roles panel shows all permission levels configured for the account. WorkSights includes four built-in roles: Owner, Executive, Manager, and Member. Each maps to a defined set of permissions shown in the table across Admin, Exec, Manager, and Member columns.
Custom roles can be created using + Add Role and inherit permissions from one of the four built-in levels. Custom roles are labelled accordingly and shown in green in the table.
Services
This panel shows a summary of the integrations currently connected to your account, with a mapped user count for each. It is a read-only overview. To manage integrations in detail, use the Services tab.

Users Tab
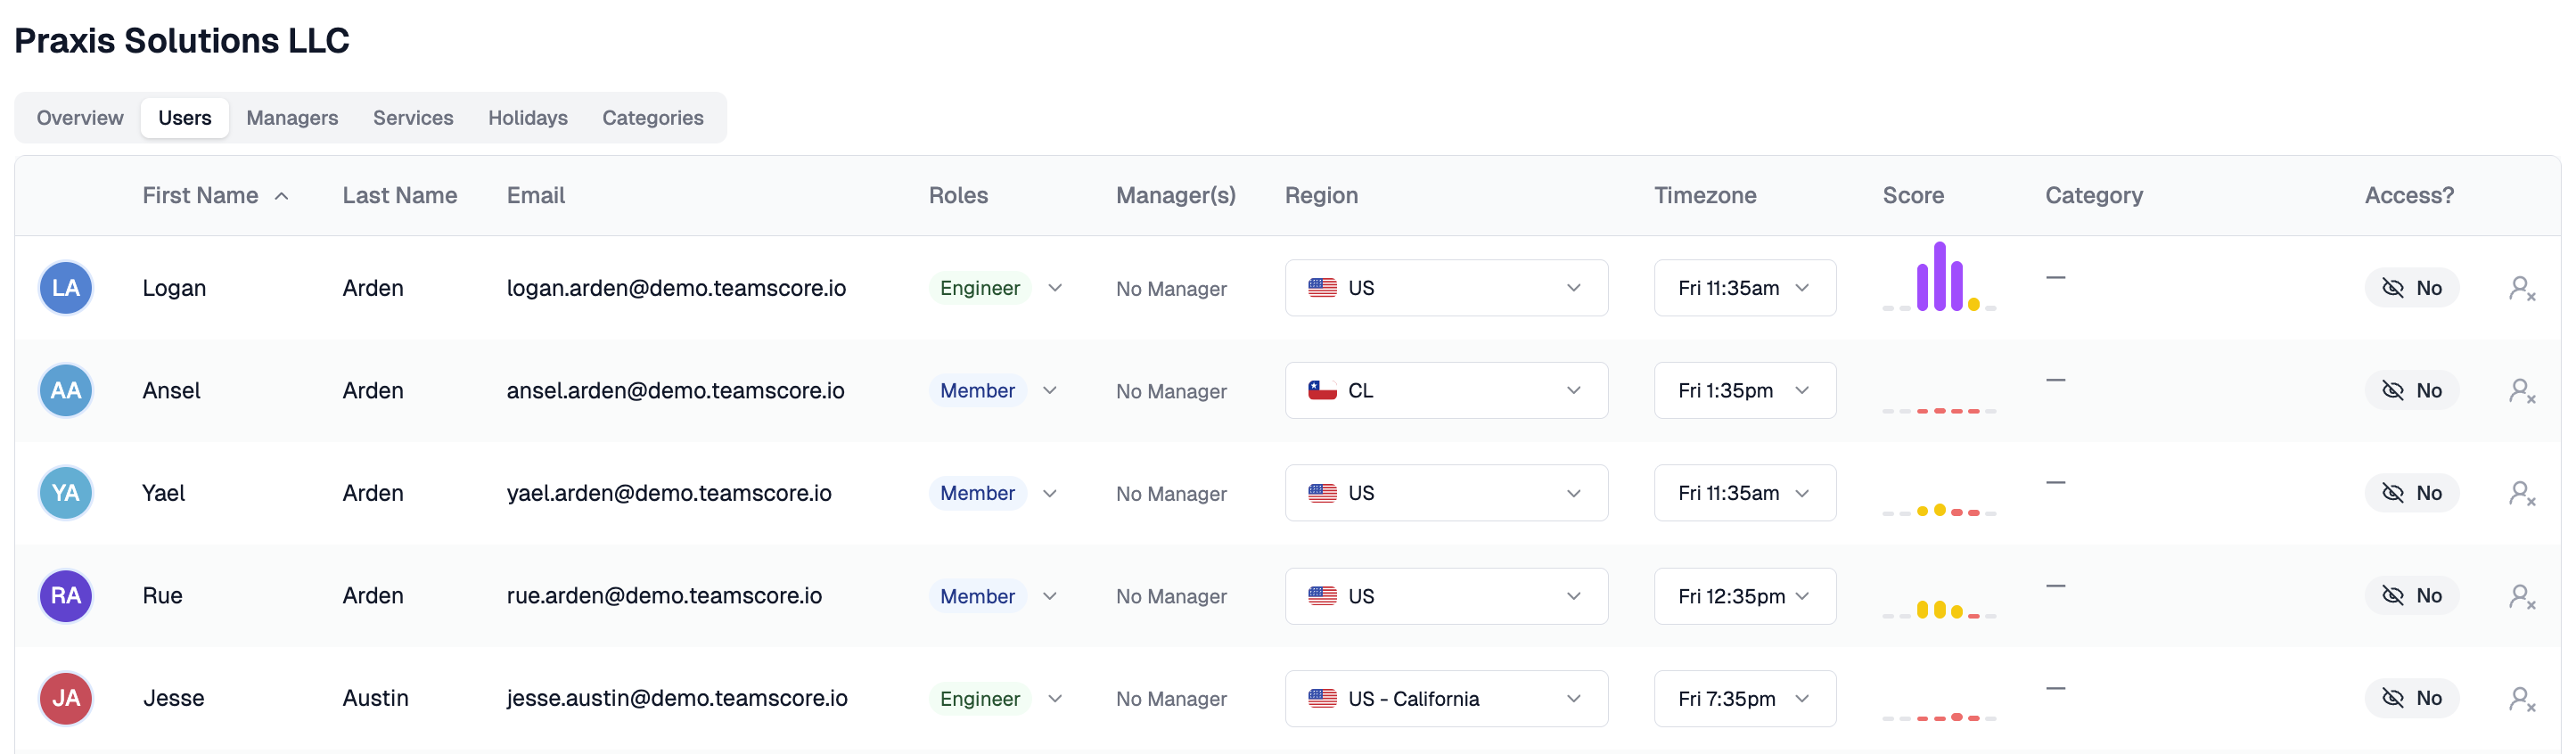
The Users tab shows everyone who belongs to this account. Search by name or email to find a specific person. Use the Show Inactive and Show Hidden Users toggles to surface users who are not visible by default.
Columns include First Name, Last Name, Email, Roles, Manager(s), and Region. Role and manager assignments can be updated directly in the table.
Managers Tab
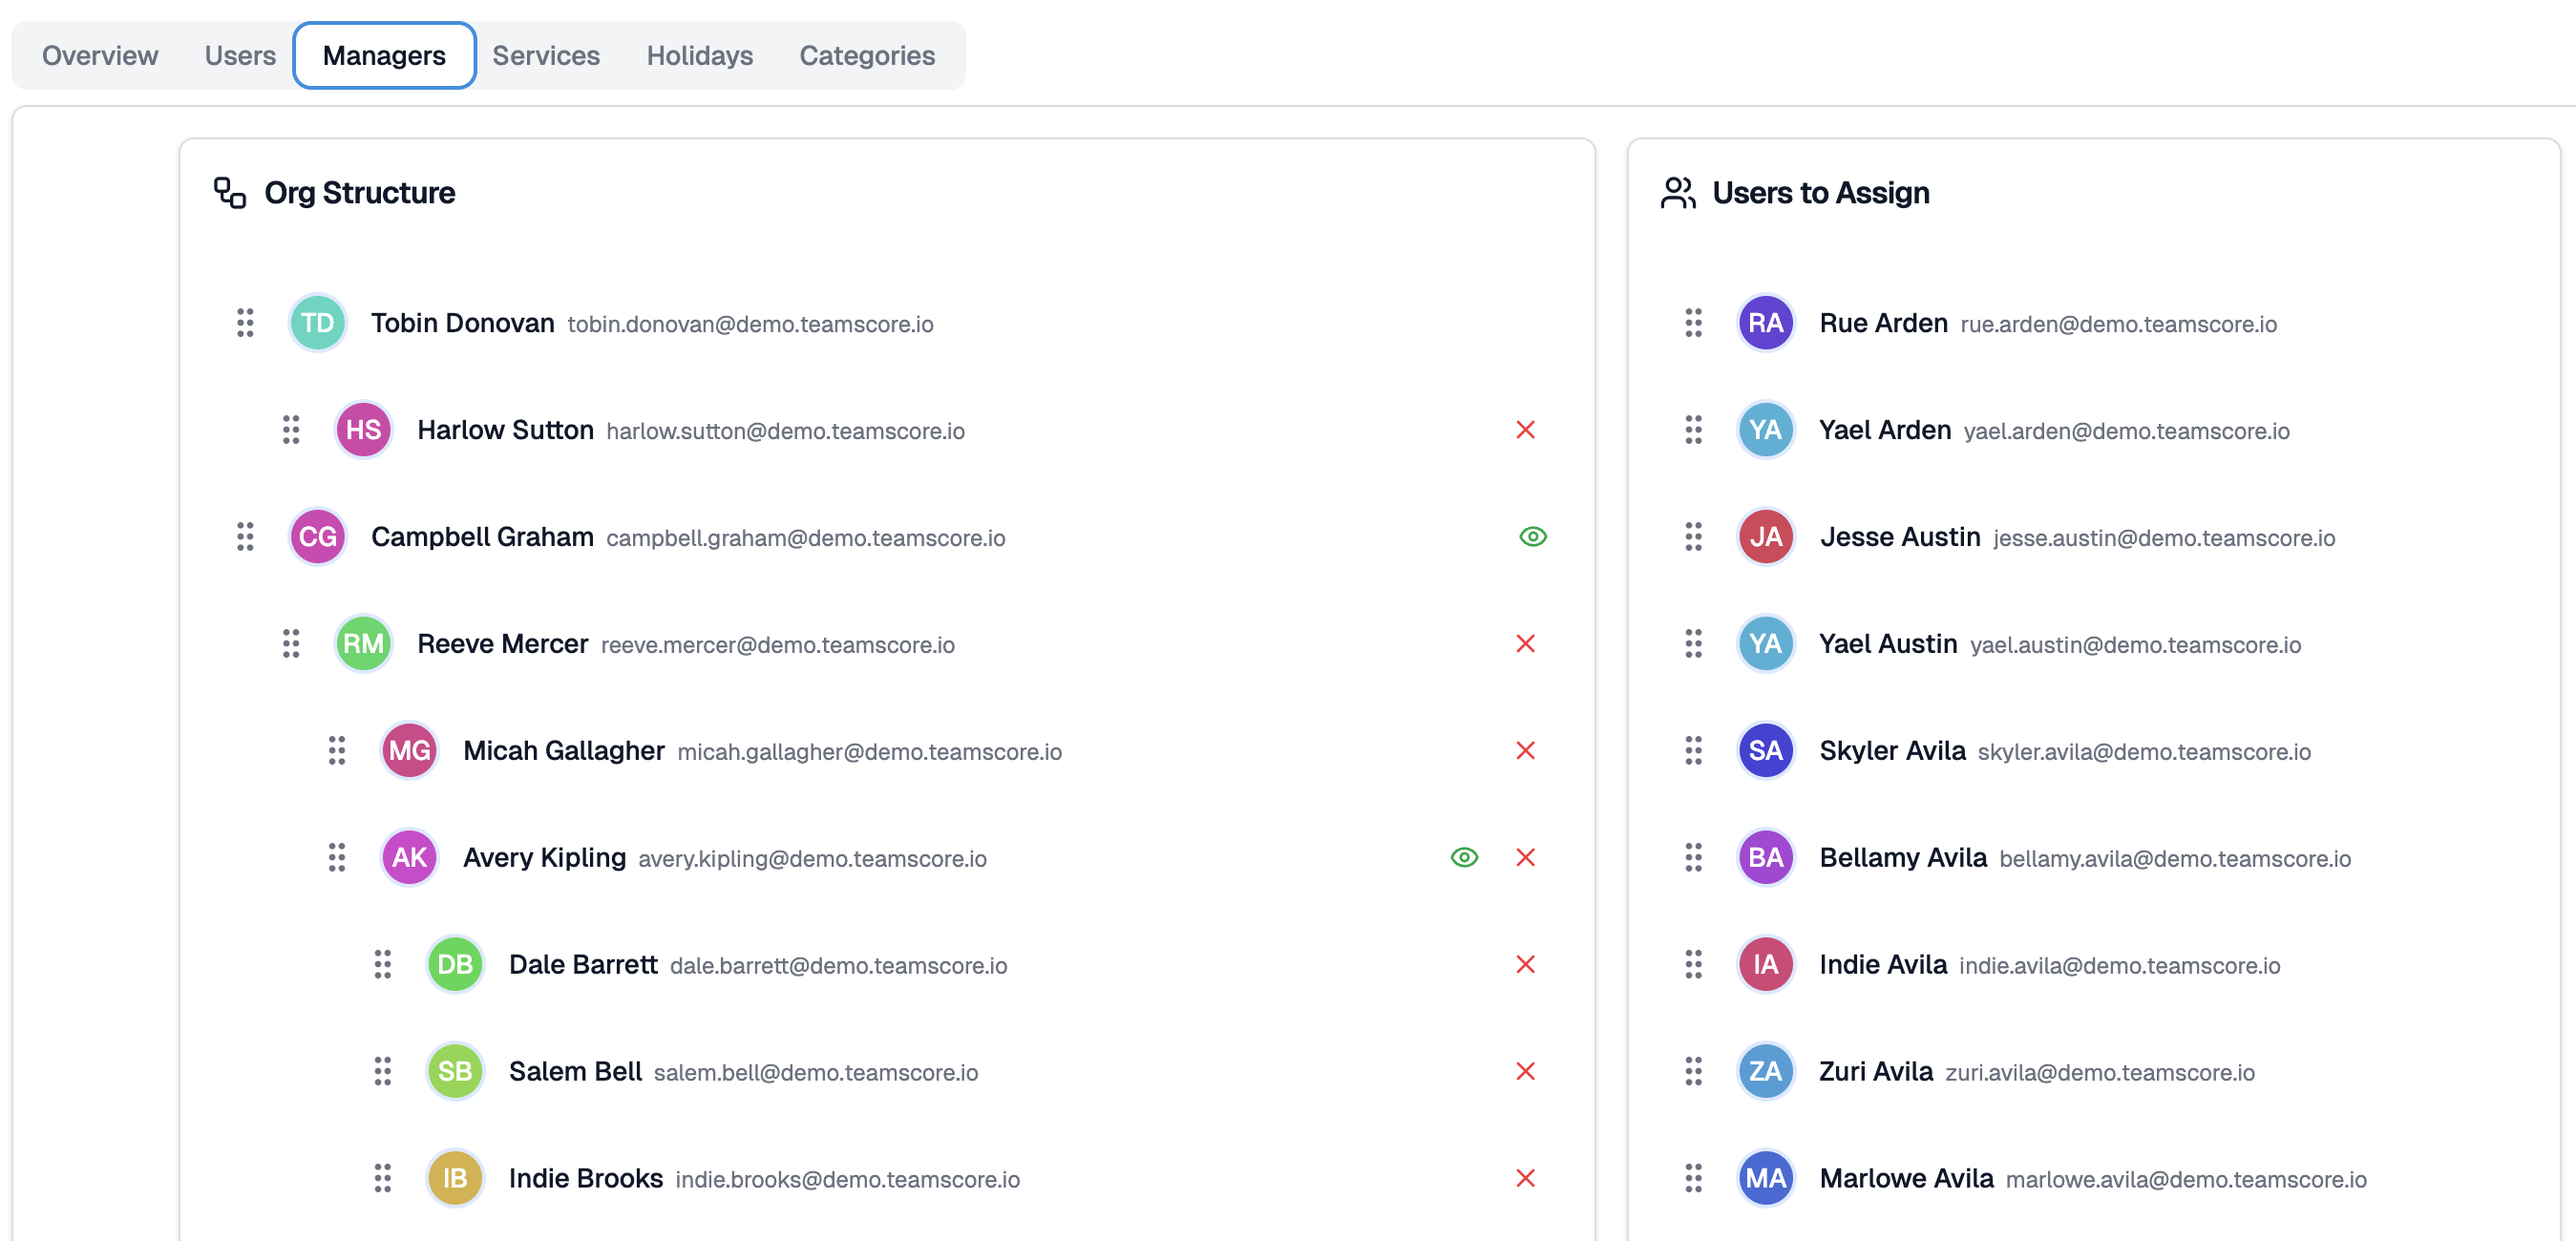
The Managers tab is where you build and maintain your organisation's reporting structure.
The left panel shows the Org Structure: users who are already placed in the hierarchy. Drag users to adjust their position. A green eye icon indicates the user has login access to the account. Click the red X to remove a user from the structure.
The right panel shows Users to Assign: users who belong to the account but have not yet been placed in the reporting structure. Drag any user from this panel into the Org Structure to assign them.
The Managers tab works well for straightforward single-manager structures. For more complex setups such as multiple managers or matrix reporting, use the individual user's profile page where you can assign multiple managers directly.
Services Tab
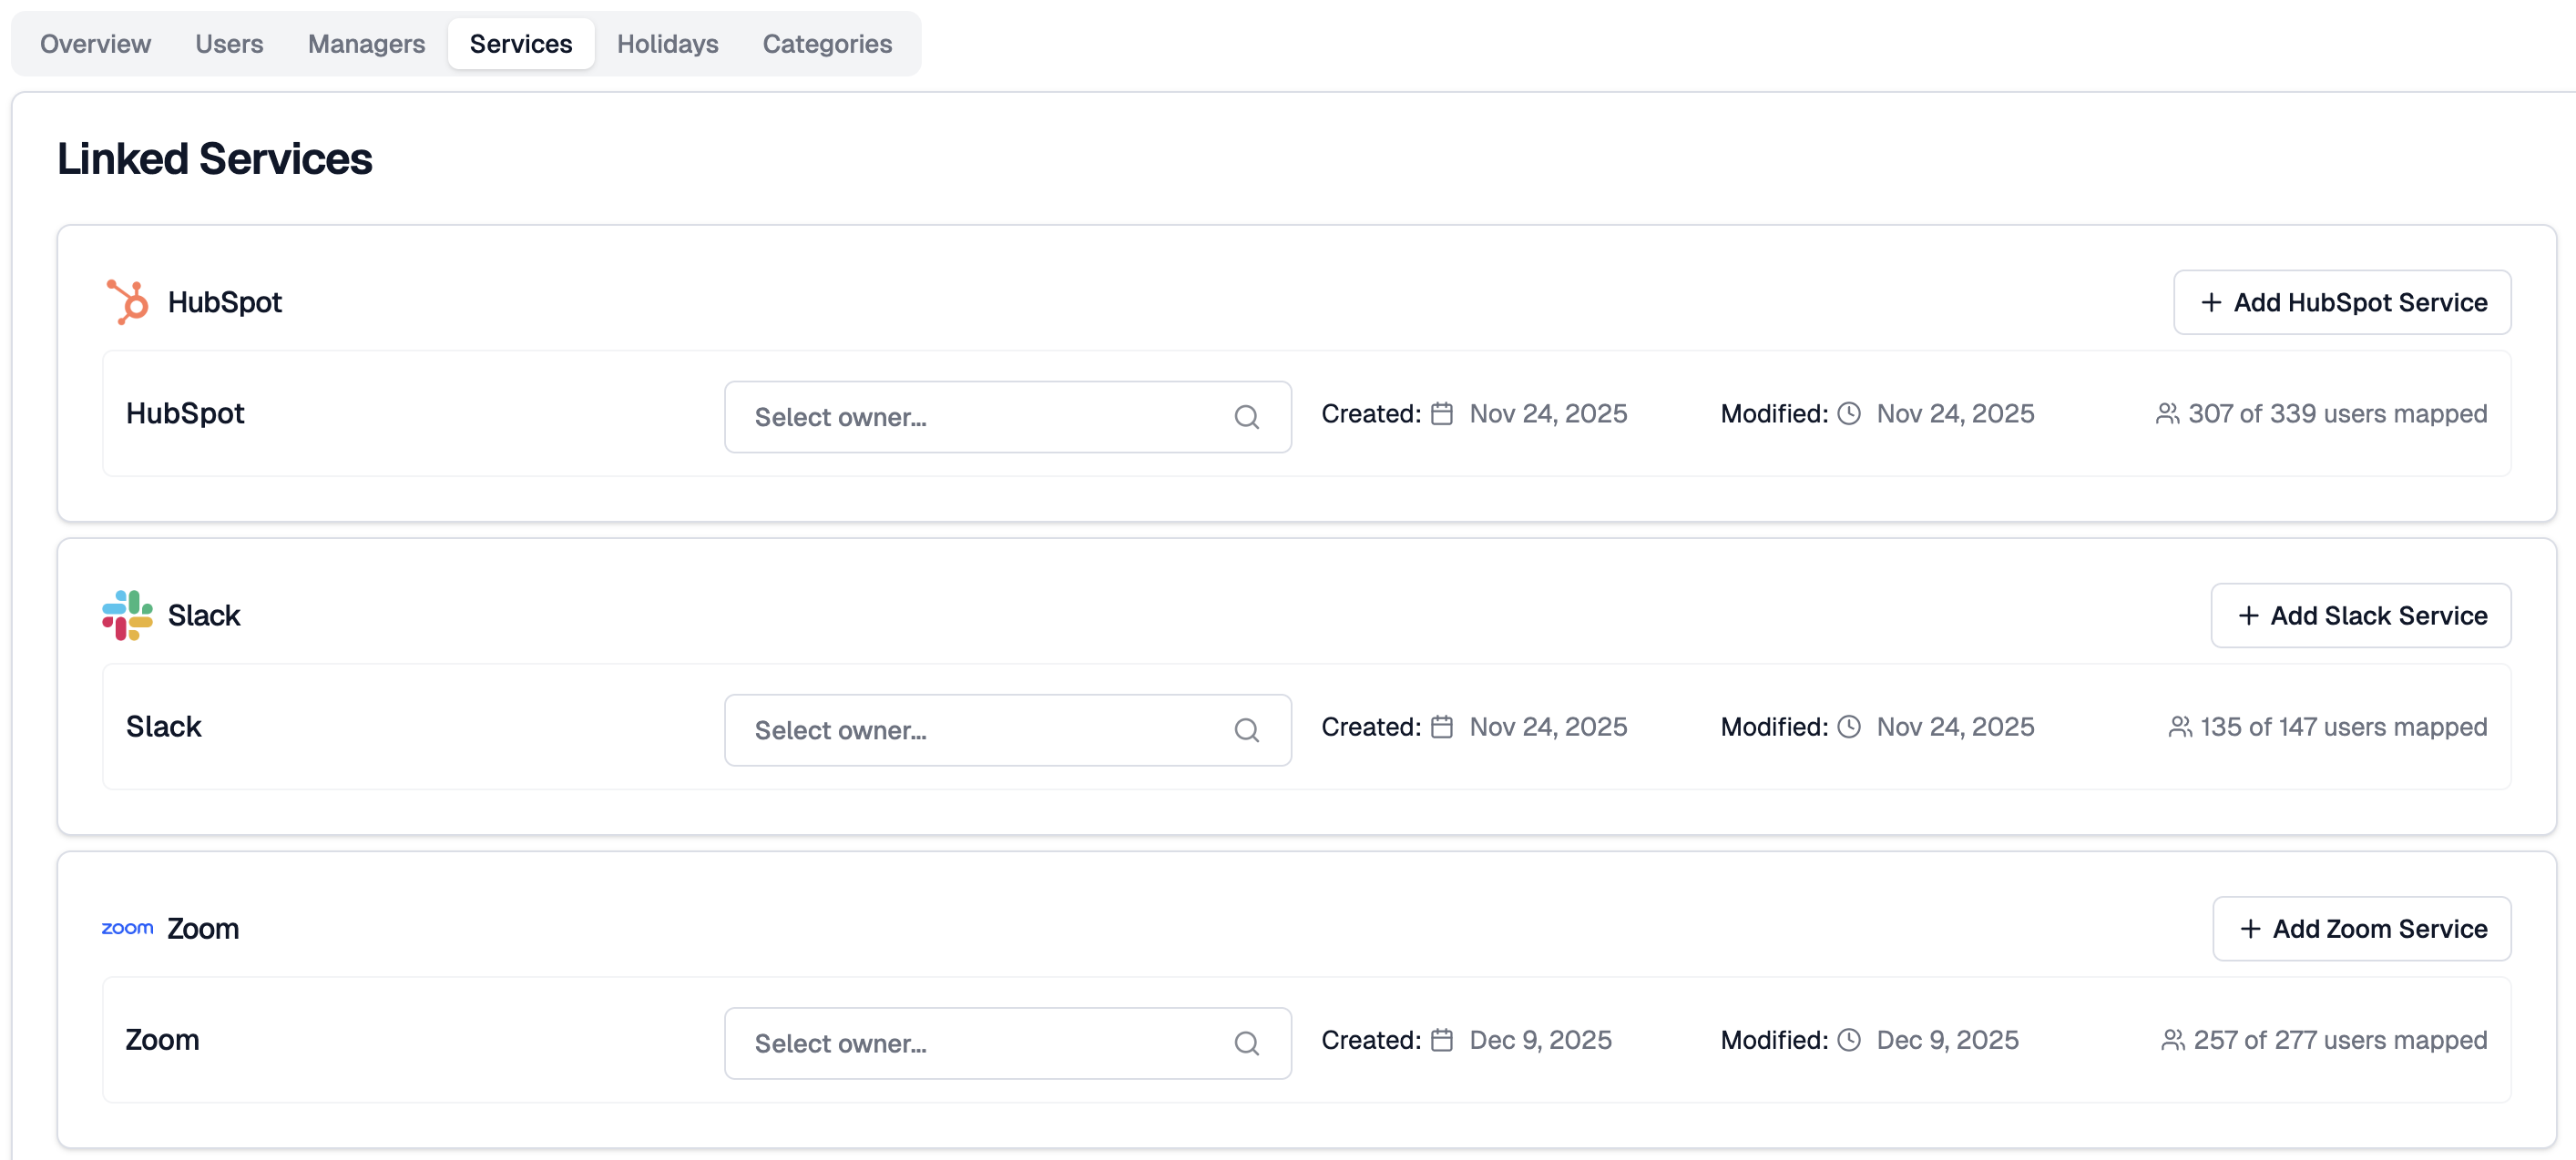
The Services tab shows all integrations linked to this account, organised by service type. Each connection shows its name, owner, created date, last modified date, and how many users are mapped.
To add another connection for an existing service type, click + Add [Service] on the right of that service group.
Click a service name to open the full Service Details page, where you can see connected users, sub-features, sync timestamps, and connection settings.
To rename a connection, click the pencil icon next to its name.

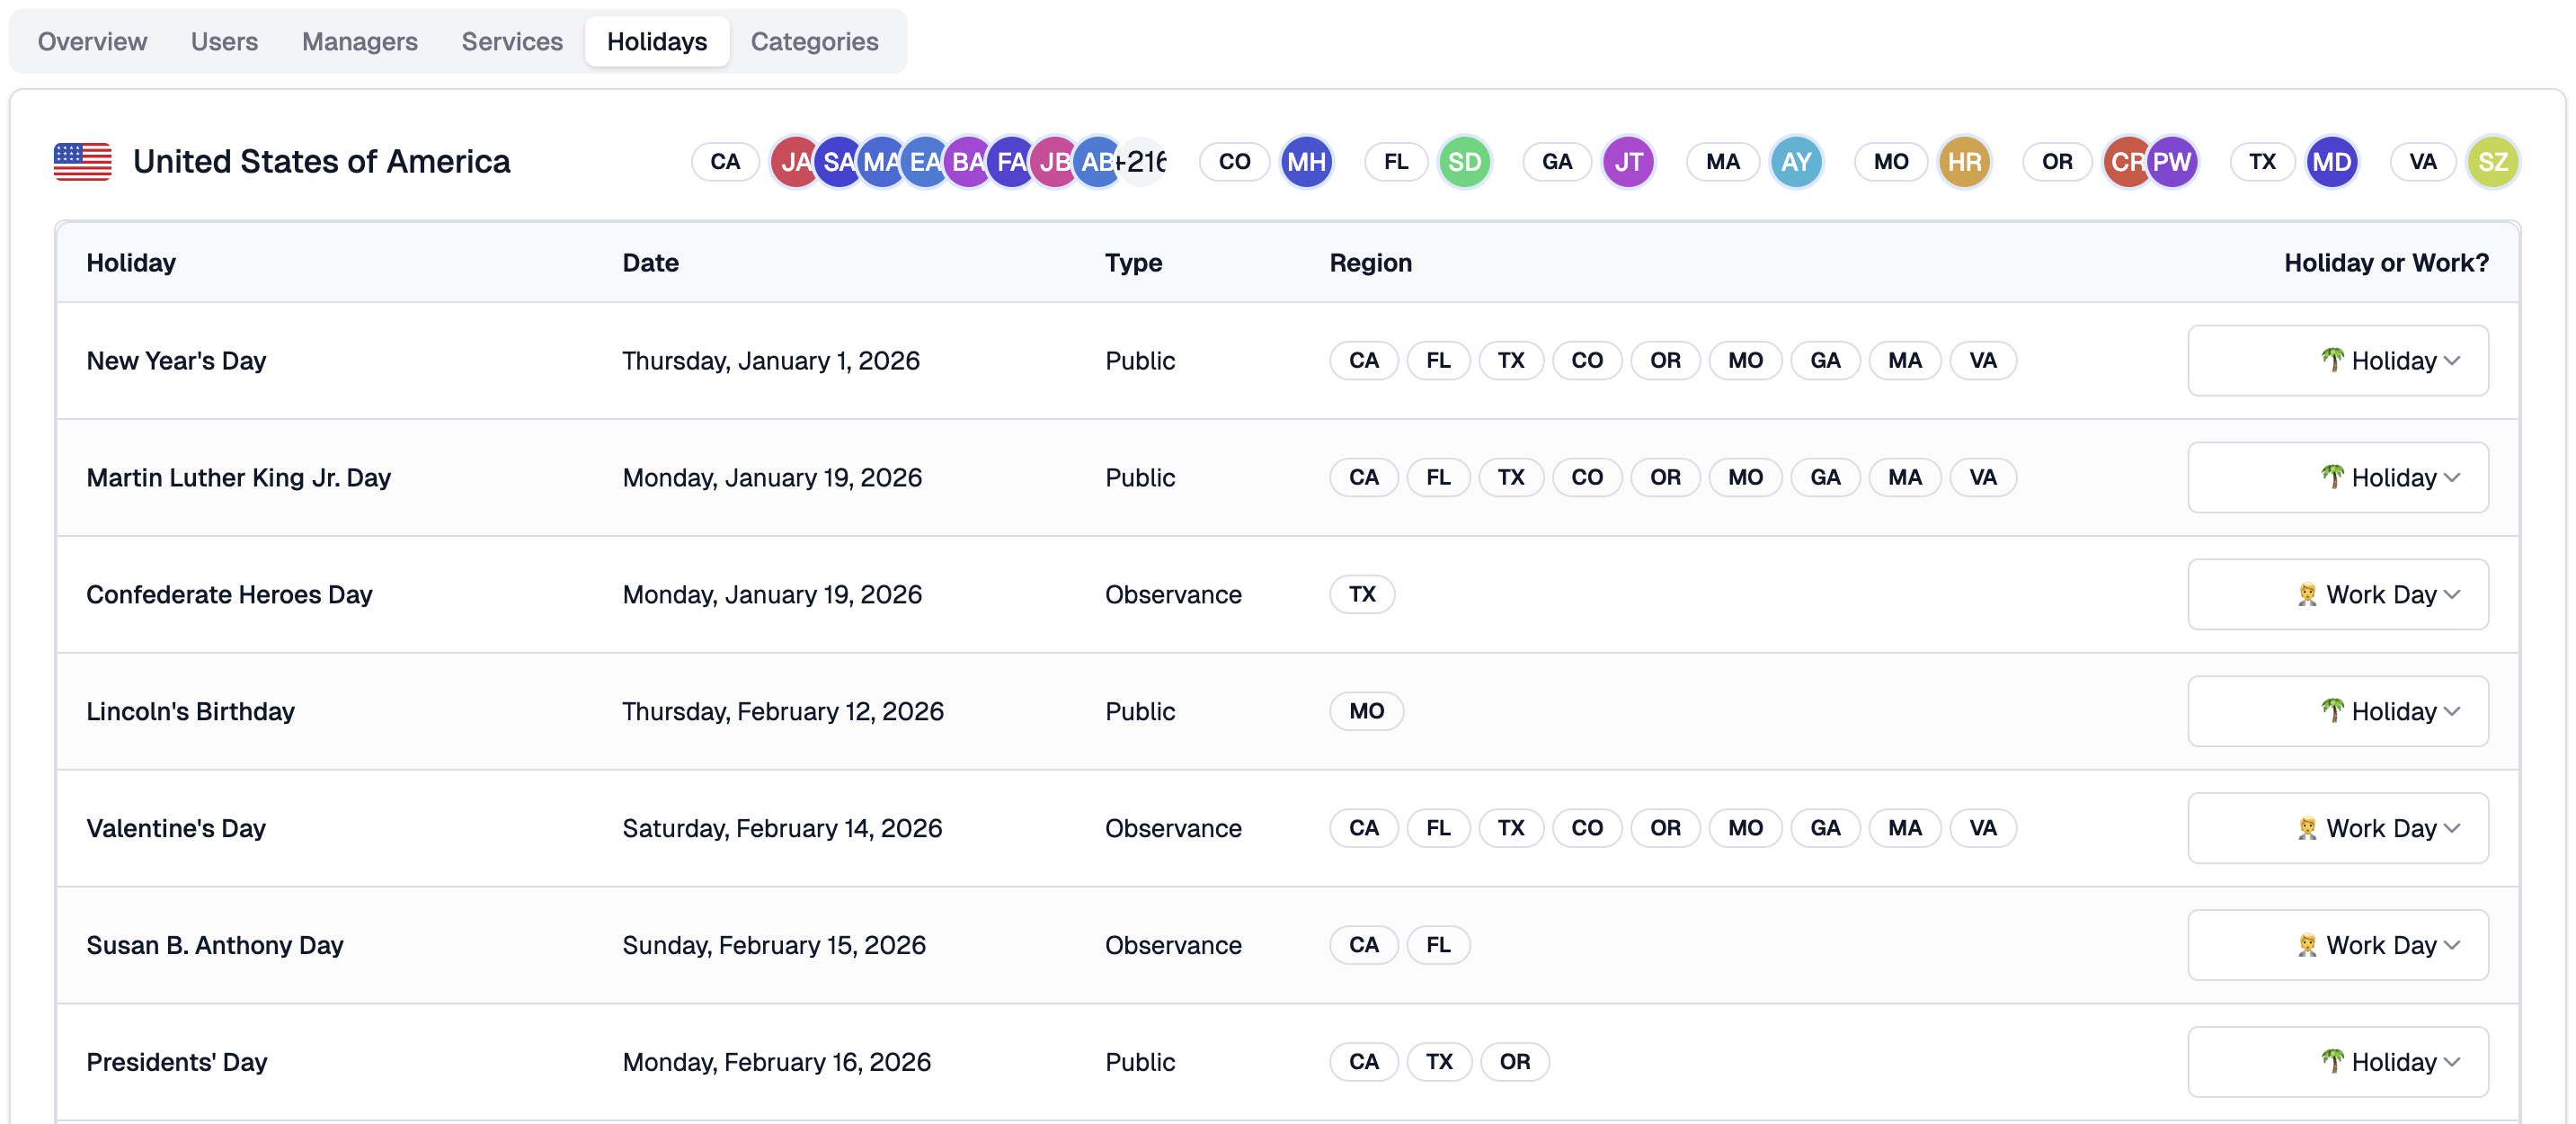
Holidays Tab
The Holidays tab shows the public holidays observed across every region represented by users in your account. WorkSights uses this data to ensure that workday calculations reflect each person's local calendar accurately.
Each country appears as its own section, with user avatars indicating who falls under that location. The holiday table shows each holiday's name, date, type (Public or Observance), the regions it applies to, and a Holiday or Work? control.
Click the selector in the Holiday or Work? column to toggle a day between Holiday and Work Day. Changes apply only to users in the affected region and update WorkSights's scheduling calculations automatically.
Categories Tab
The Categories tab shows the full library of role categories available for your account. Categories define the functional roles within your organisation and are what Observers use to scope their analysis to the right teams.
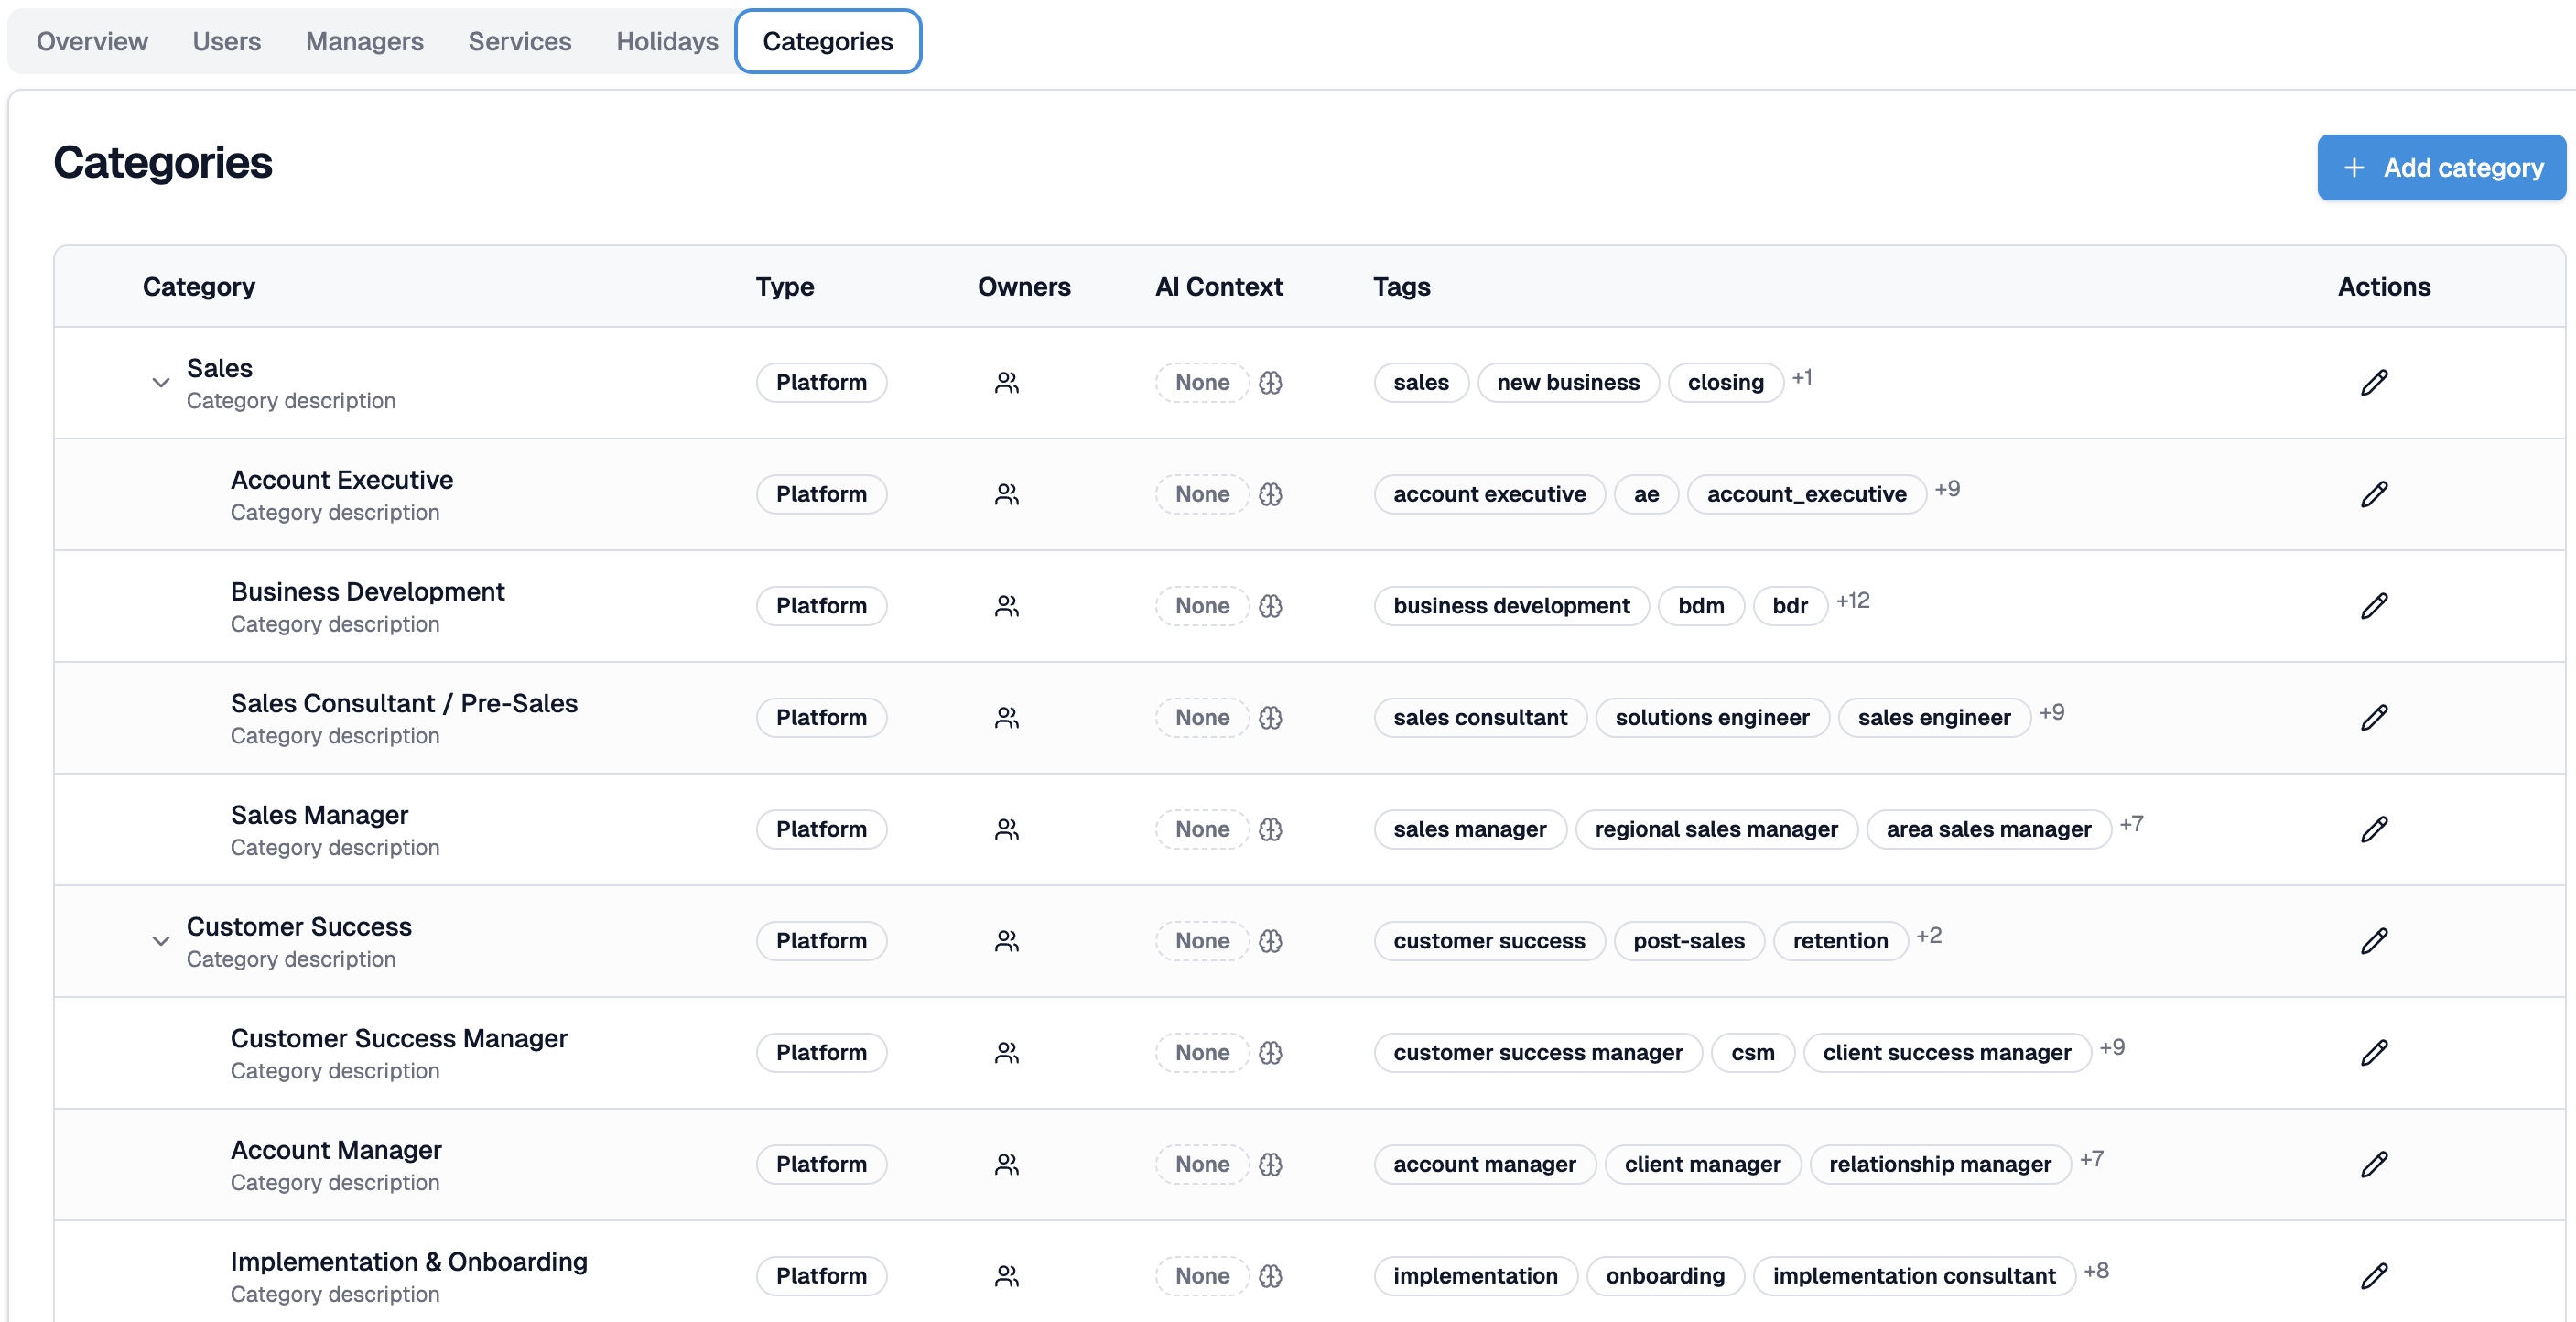
The table shows categories in a hierarchical structure, with parent categories collapsible to reveal their subcategories. Each row shows:
- Category - the role name and a short description.
- Type - whether the category is a Platform default or a custom one created for your account.
- Owners - users assigned as owners of this category.
- AI Context - whether an AI Context has been set for this category. Categories with context give Observers richer information about what good work looks like for that function.
- Tags - keywords used to automatically match users to this category during onboarding and enrichment.
- Actions - click the edit icon to modify a category's title, description, parent, tags, or AI Context.
To add a new category, click + Add category in the top right. Platform default categories cannot be edited directly, but you can customise them for your account or create entirely new ones from scratch.
Related Guides
AI Context - what to write and how it shapes Insights and reports
Activity Scores - how score visibility settings affect what your team sees
Assign Manager Relationships - setting up reporting lines in detail
Connected Services - managing integrations at the account level
Team List - managing users, roles, and categories across your account